
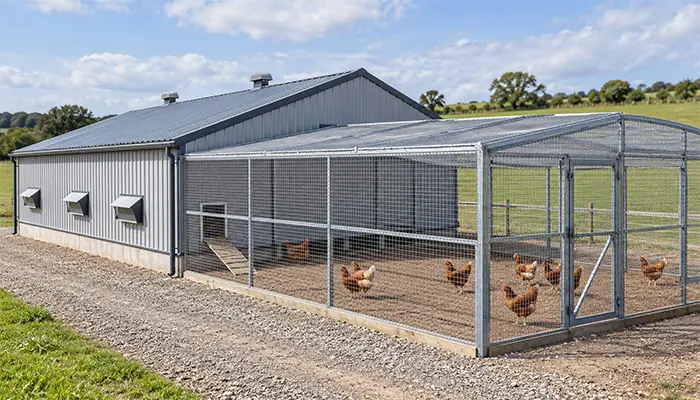
A chicken coop can look secure while leaving an easy route inside. A loose mesh edge, an unlatched nesting-box lid, or a gap beneath a gate may be enough to put the flock at risk. Strong fencing helps, but the connections between materials often deserve just as much attention.
To predator-proof a chicken coop, build a continuous barrier around the birds, strengthen doors and openings, prevent access from below, and check the enclosure regularly. Match each measure to the animals present on your site.
This guide covers practical upgrades for existing coops, chicken runs, mobile housing, and poultry farms. “Predator-proof” describes the goal: no single design or material guarantees protection against every animal in every situation.
What Makes a Chicken Coop Predator-Proof?
A secure chicken coop must do more than contain chickens. Materials that stop birds from wandering may offer limited resistance to an animal digging, climbing, chewing, or pulling at the enclosure.
Think of protection in three layers:
- The coop: a secure resting and nesting area, especially important overnight.
- The run: an enclosed outdoor area with appropriate side, ground, and overhead protection.
- The surrounding site: managed feed storage, clear inspection routes, and additional perimeter protection where needed.
Every layer has openings. Doors, ventilation inlets, roof junctions, and service holes must be included in the design. A screened-in chicken coop is only as secure as its screening material, supporting frame, and fasteners.
Start with the most vulnerable occupied area. If birds cannot be safely housed tonight, restrict access to a verified secure enclosure while permanent repairs are arranged.
Which Predators Are a Threat to Your Chickens?
Identify local risks before choosing materials. A design intended to discourage a fox may still have openings suitable for smaller animals.
| Predator or animal group | Main concern | Priority inspection points |
|---|---|---|
| Foxes, coyotes, and dogs | Digging, pushing, or damaging weak structures | Ground edges, gates, frames, and panel connections |
| Waschbären | Climbing, reaching through mesh, and manipulating simple closures | Mesh openings, roof edges, latches, and nesting-box lids |
| Weasels and other small mammals | Entry through small gaps | Corners, door clearances, wall joints, and service openings |
| Rats and snakes | Access to feed, eggs, or young birds | Feed stores, low-level holes, drains, and brooding areas |
| Hawks and owls | Access from above | Open runs and incomplete overhead coverage |
| Bears, where present | Substantial damage to ordinary enclosures | The overall protection system and food attractants |
These are examples rather than a universal species list. Predators vary by country and region, and attacks can occur during daylight as well as overnight.
Tracks, disturbed soil, damaged panels, and camera recordings can help identify the problem. Missing birds alone do not establish which animal was responsible.
Plan a Secure Chicken Coop Before You Build or Retrofit
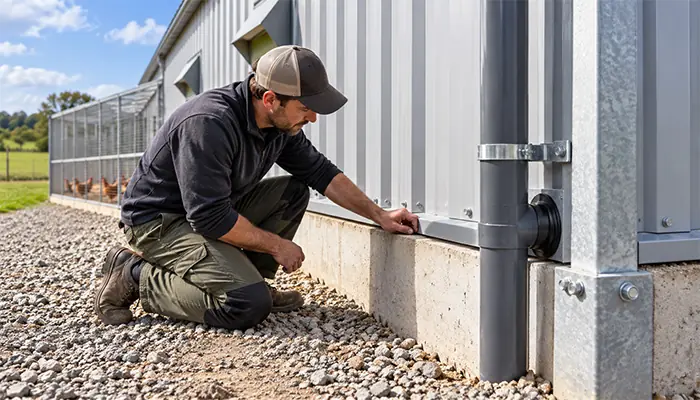
Walk around the enclosure from ground level to roof level. Record each opening and the condition of the material around it. Look behind equipment and beneath thresholds, where defects can be difficult to see during routine work.
A useful inspection follows the boundary continuously. If you cannot trace an unbroken barrier around the occupied space, investigate the interruption.
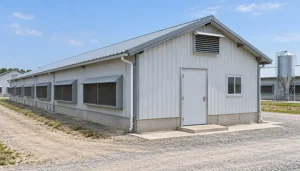
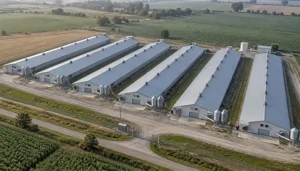
For a new poultry farm, coordinate the building, equipment, and access layout before installation. Position feeding lines, drinkers, nests, and service aisles so staff can inspect the perimeter without dismantling equipment.
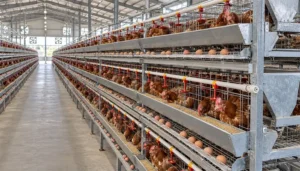
When selecting cage-free poultry equipment, include these inspection and maintenance needs in the house layout. Interior equipment and the external building envelope perform different jobs; both need appropriate planning.
For commercial houses, add fan openings, cooling-pad areas, manure outlets, and utility penetrations to the inspection drawing. Changes made by different contractors can otherwise leave gaps between their scopes of work.
How to Predator-Proof a Chicken Coop: Seven Practical Steps
Step 1: Strengthen the Frame, Walls, and Roof
Begin with the structure supporting the barrier. A strong mesh panel cannot compensate for rotten timber, loose posts, badly corroded steel, or a door frame pulling away from the wall.
Replace damaged components and secure panel edges to sound material. Check roof-to-wall joints, removable access panels, and nesting-box covers. Any part that opens for cleaning or egg collection also needs a reliable closure.
For outdoor runs, consider the loads placed on the frame by roof panels, wind, and accumulated snow where relevant. Adding a heavy cover to a light frame can create another failure point.
Keep inspection and repair access practical. A concealed fastener may look tidy but become difficult to check or replace later.
Step 2: Choose Suitable Mesh
The name of a mesh product does not tell you everything about its performance. Evaluate the clear opening, actual wire diameter, weld or weave quality, coating, and how it will attach to the frame.
| Material | Possible role | Important limitation |
|---|---|---|
| Hardware cloth | Smaller openings at windows, vents, and other vulnerable areas | Strength varies with wire diameter, construction, and installation |
| Schweißgitter | Run panels or a supported structural barrier | Larger openings may allow small-animal entry or reach-through |
| Chicken wire | Bird containment in suitable supervised or secondary areas | It should not be assumed to resist determined predators |
| Chain-link fencing | A robust outer enclosure when properly supported | Typical openings do not exclude many small animals |
Half-inch mesh, approximately 12.7 mm, is commonly considered for coop openings. Quarter-inch mesh, approximately 6.35 mm, may be considered where smaller openings are needed. Neither size alone establishes adequate protection: very small animals, thin wire, poor welds, and weak attachments can change the result.
Ask suppliers for wire diameter in millimeters as well as any gauge designation. Gauge systems differ, and smaller openings sometimes come with thinner wire.
Ordinary insect screening and shade cloth should not be treated as structural predator barriers.
Step 3: Secure Mesh Edges and Panel Joints
Inspect how the mesh connects to the building. A loose corner gives an animal a starting point for pulling the barrier away.
Use fixings appropriate to the substrate. On sound timber, suitable screws with washers or a properly secured clamping strip can spread the load. Steel frames require compatible clips, fasteners, or a designed connection.
Give particular attention to:
- Corners and changes in direction.
- Joints between separate mesh panels.
- The edges around doors and windows.
- Connections between the mesh and ground barrier.
- Cut edges that could injure birds or workers.
Choose fixing spacing for the material, frame, and expected loads. Do not rely on a few widely separated attachments or assume that short staples will resist pulling.

Step 4: Install a Predator Apron or Buried Barrier
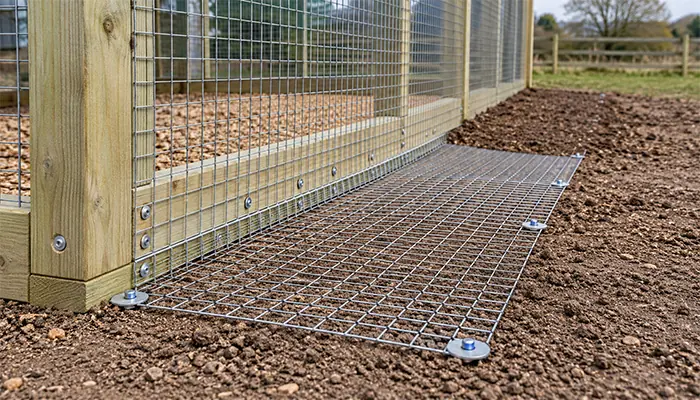
To keep predators from digging under a chicken run, address the full perimeter, including gates.
A chicken coop predator apron is mesh extending outward along the ground from the enclosure. It must connect securely to the wall or fence, remain flat, and have its outer edge secured. Soil or suitable ground cover can conceal it without leaving hazardous exposed edges.
A buried vertical barrier extends downward beside the enclosure. Excavation takes more work, particularly around an existing coop, but may suit some sites.
A depth of 12 inches, approximately 30 cm, is a commonly cited starting point for buried mesh against digging predators. Treat it as a planning reference rather than a universal specification. Predator behavior, loose soil, slopes, erosion, and ground conditions can require a different approach.
Whichever method you choose, keep the barrier continuous at corners and entrances. Inspect it after heavy rain or ground disturbance. A wide apron does little where an unsecured gate leaves a route beside it.
Step 5: Reinforce Doors, Hinges, and Latches
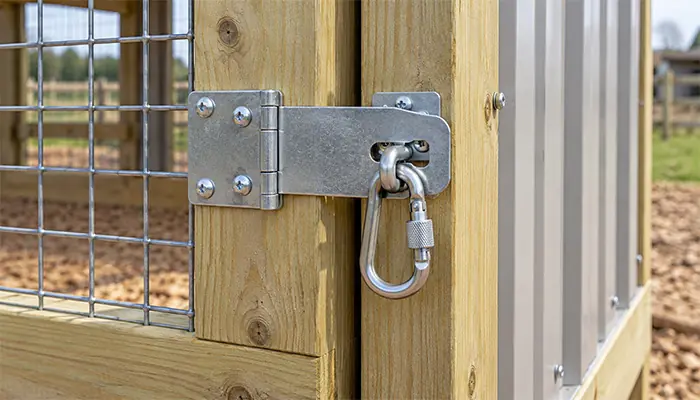
A predator-proof chicken coop door needs a sound frame, secure hinges, a suitable latch, and controlled gaps when closed.
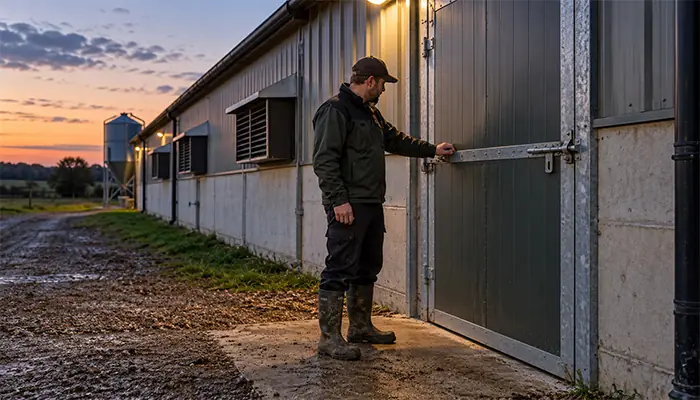
Check the main entrance, bird pop-hole, egg-collection access, and cleaning panels. Make sure the latch actually engages when the door is pulled into position. Warped timber, sagging hinges, and accumulated litter can prevent full closure.
Where animals can manipulate simple hooks or catches, use a closure requiring a deliberate release action, such as a suitable latch secured with a locking clip. Evaluate the complete arrangement rather than relying on the latch label.
For automatic chicken doors, check the closed position, obstruction response, power supply, and manual operation. Inspect the result daily. A timer sending a close command does not prove the doorway is sealed.
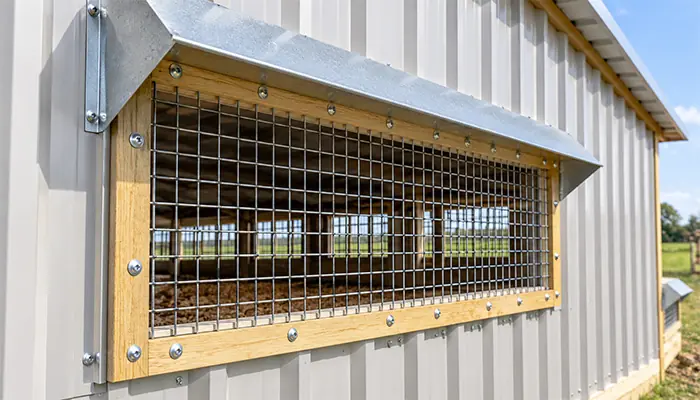
Step 6: Protect Vents and Windows While Maintaining Airflow
Ventilation openings are essential, so protect them without simply sealing the house.
Fit suitable mesh or guards to sound framing and inspect the edges. Include openings beneath roof sheets and around pipes, cables, or drainage components.
In mechanically ventilated poultry houses, additional screening can restrict airflow and collect dust. Coordinate the mesh, available opening area, fan performance, and cleaning access with the ventilation design.
Raised internal flooring also needs separate consideration. A Geflügel-Spaltenbodensystem is an interior housing and manure-management component. It does not replace secure external walls, protected underfloor access, or perimeter barriers.
Step 7: Test the Enclosure and Establish a Closing Routine
Before birds occupy the finished enclosure, inspect it from both sides. Gently check accessible edges for movement, verify every latch, and look beneath closed doors.
After installation, settle on an evening routine: confirm birds are inside the secure area, close the relevant entrances, and physically check the closures.
On a commercial farm, assign responsibility for each house. Record unresolved defects and the temporary arrangements used until repairs are complete. A visible fault should lead to action rather than simply another entry in the inspection log.
How to Predator-Proof a Chicken Run
A chicken run needs its own assessment. Strong coop walls do not protect birds spending the day in an open or poorly secured enclosure.
Build a Continuous Side and Ground Barrier
Use supported fencing with suitable openings and secure panel joints. Check where the run meets the coop; small triangular gaps often remain around roof slopes, brackets, or uneven walls.
Pay attention to the entrance threshold. Gates need practical operating clearance, but that clearance must not become an uncontrolled opening. Keep the ground barrier connected through the gate area.
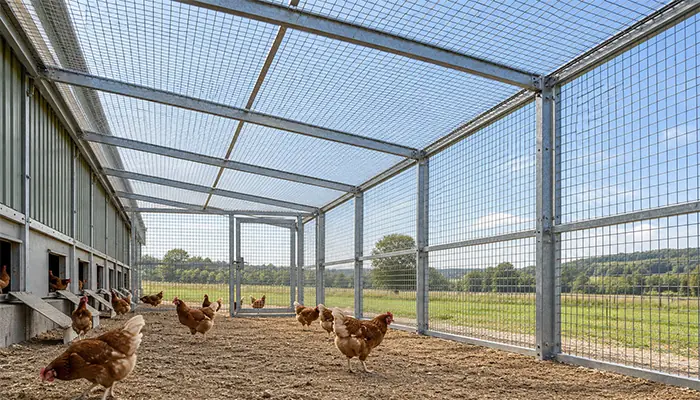
Add Appropriate Overhead Protection
An open run allows aerial access. A cover can reduce that exposure, but the material must suit the risk.
Lightweight bird netting may serve a different purpose from supported welded mesh or a solid roof. Do not assume it will resist climbing mammals or substantial pulling.
Keep overhead coverage continuous at the edges. Support it to avoid excessive sagging and design for local weather loads. A solid roof also needs drainage so runoff does not wash out the ground barrier.
Reduce Reach-Through Exposure
Consider where chickens rest relative to the fence. Moving roosts away from exposed mesh can reduce opportunities for an animal outside to reach a resting bird.
If the run remains accessible overnight, assess it as occupied night housing. Its sides, top, bottom, and entrances all need protection appropriate to that use.
Adjust Protection for Specific Predators
Foxes, Coyotes, and Dogs
A fox-proof chicken coop requires attention to both digging and the strength of the enclosure. Check gate bottoms, loose fence bases, unsupported panels, and connections to the coop.
Where dogs or coyotes are a concern, assess posts, frames, hinges, and anchors as well as mesh. A rigid panel connected to a weak support can still fail.
Waschbären
For a raccoon-resistant enclosure, examine access above ground level and opportunities to reach through the mesh.
Secure lids and doors with suitable closures, remove loose mesh edges, and review resting positions near the boundary. Do not assume a high opening is inaccessible because it is above a person’s normal working height.
Weasels, Rats, and Snakes
A small-animal exclusion plan must include the gaps around the mesh, not only the openings within it. Check service penetrations, corners, worn thresholds, and drains.
Young chicks deserve particular attention. In a rearing house equipped with baby chick brooder cages, inspect the building envelope and openings around feeding, water, and manure-handling services. The cage system should not be assumed to make the surrounding house predator-resistant.
Keep feed storage secure and repair damage promptly. For persistent small-animal problems, identify the species before selecting opening sizes and repair details.
Bears
An ordinary wooden coop or wire enclosure should not be described as bear-proof simply because its mesh is reinforced.
Where bears are present, obtain site-specific advice on protecting poultry and managing food attractants. Appropriately designed and maintained electric fencing may be part of that system. It requires suitable equipment, installation, grounding, and ongoing checks; it is not equivalent to adding an ordinary fence wire.
Can Chicken Tractors and Tunnels Be Predator-Resistant?
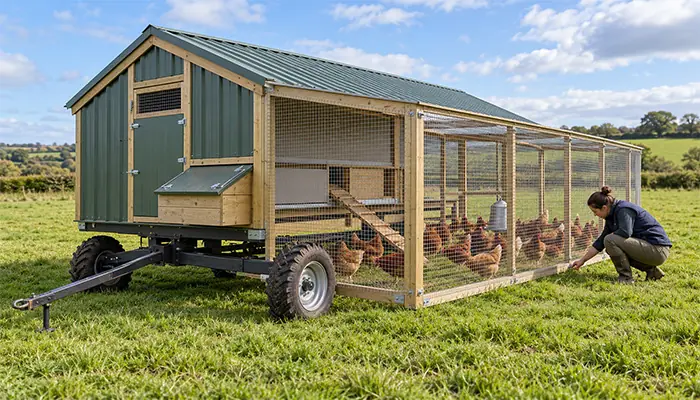
Mobile housing introduces a changing ground connection. After every move, inspect the edges, wheel openings, tow-frame junctions, and any gap created by uneven pasture.
A fixed buried barrier does not transfer directly to a chicken tractor that moves daily. The design needs a practical way to restore protection each time the unit is repositioned.
Check that doors stay aligned after movement and that ramps do not prevent closure. Where additional perimeter fencing is used, inspect it separately and recognize that it does not address every aerial or small-animal risk.
Chicken tunnels need the same continuous boundary. Secure the ends, bends, supports, and connections to the coop or run. A protected central section offers limited value if an animal can enter at an unsecured junction.
Keep the Coop Weather-Resistant Without Losing Protection
Weather damage can turn a previously secure chicken coop into a vulnerable one.
Repair roof leaks, maintain drainage, and prevent water from repeatedly saturating structural timber. Inspect metal at cut edges, joints, and ground contact points where deterioration may be less visible.
After storms, look for displaced panels, fallen branches, eroded soil, and loose anchors. Remove accumulated debris from protective screens while preserving the required airflow.
A weatherproof chicken coop still needs ventilation. Closing vents to stop rain or animals can create a separate housing problem. Address rain entry with appropriate detailing and protect the opening with a suitable barrier.
Daily Management That Supports Predator Protection
Physical barriers work best when routine tasks support them. Keep the surroundings inspectable, clean feed spills, and store feed in secure containers suited to local animal risks.
Do not interrupt the flock’s necessary access to feed and water simply to remove attractants. Plan storage, feeder management, and nighttime housing around the production system.
| When | What to check |
|---|---|
| Each morning | New digging, damaged mesh, unusual tracks, and equipment faults |
| Before night | Birds in the secure area; doors, lids, and latches fully closed |
| Weekly | Connections, hinges, corrosion, vegetation, and feed-storage condition |
| After severe weather | Roofs, anchors, ground barriers, drainage, and displaced materials |
| After moving mobile housing | Ground contact, wheel gaps, doorway alignment, and attached fencing |
| After maintenance work | Reclosed access panels and repaired service penetrations |
Motion lights, alarms, and similar deterrents may have variable results. Keep them supplementary to physical exclusion. Predator spikes also do not close ground-level gaps or protect openings elsewhere in the enclosure.
On larger farms, include perimeter inspection in staff handovers so a door opened for a delivery or repair is not left unsecured.
Common Chicken Coop Security Mistakes
Several avoidable mistakes can undermine an otherwise reasonable design:
- Buying mesh by opening size alone. Check wire diameter, construction, supports, and fixings too.
- Strengthening walls but ignoring the roof or base. Follow the entire boundary.
- Leaving small gaps around new services. Reinspect after plumbing, electrical, and equipment work.
- Trusting an automatic door without checking it. Verify the actual closed position.
- Treating a deterrent as the main barrier. Keep dependable physical protection in place.
- Postponing repairs. Temporarily move birds to secure housing when a defect exposes them.
The best upgrade is often the one that closes a known weak point. Adding another layer to an already strong section will not resolve an open doorway elsewhere.
What to Check Before Buying a Predator-Resistant Chicken Coop
When reviewing a predator-proof chicken coop for sale, ask for construction details and drawings. Product photographs may not show the underside, door clearances, or connections clearly.
Request information on:
- Mesh opening size, actual wire diameter, and surface treatment.
- Frame material, panel connections, and anchoring requirements.
- Doors, hinges, latches, and removable panels.
- Ground barriers and whether they are included.
- Ventilation openings and maintenance access.
- Site preparation, installation responsibilities, and replacement parts.
Provide the supplier with your location, flock size and age, production system, site dimensions, and known predator concerns. Include photographs of the proposed ground and existing structures when possible.
For farm projects, separate equipment supply from building works and site installation. Clarify who protects service openings, fits ground barriers, and checks the completed enclosure. This helps prevent gaps between packages supplied by different contractors.
Evaluate lifetime maintenance as well as initial cost. A barrier that staff can inspect, clean, and repair is easier to keep effective.
Frequently Asked Questions
Can a Chicken Coop Be Completely Predator-Proof?
No design should be treated as an unconditional guarantee against every animal. A well-built enclosure can substantially reduce exposure when its materials, connections, openings, and ground protection match local risks. Regular inspection remains important because weather, wear, ground movement, and daily use can create new weaknesses.
Is Chicken Wire Enough to Keep Predators Out?
Chicken wire is primarily useful for containing poultry in appropriate applications. It should not automatically be treated as a barrier against determined predators. Assess the animals present and compare suitable hardware cloth or welded mesh, including wire diameter, support, and attachment strength.
How Do You Stop Predators from Digging Under a Chicken Run?
Create a continuous ground barrier using a suitable outward apron, buried mesh, or an appropriate foundation detail. Connect it securely to the enclosure and continue it through corners and entrances. Choose dimensions for the site and animal risk, then inspect for erosion, displacement, and new digging.
What Makes a Chicken Coop Door More Secure?
A secure door combines a sound frame, reliable hinges, controlled gaps, and a latch appropriate to the animals present. The closure must engage fully despite litter, wear, or changes in alignment. Check associated access points, including nesting-box lids and cleaning panels.
How Can You Fox-Proof an Existing Chicken Coop?
Inspect the perimeter for digging access and check the strength of doors, panels, and their supports. Repair weak connections, install a suitable ground barrier, and review the run’s sides and top. Maintain a secure nighttime enclosure and repeat checks after storms or ground disturbance.
Can an Automatic Chicken Door Replace Nightly Checks?
An automatic door can assist the closing routine, but it does not verify the rest of the enclosure. Obstructions, power problems, changing light conditions, or birds remaining outside can affect the result. Confirm that the birds are inside and the doorway has actually closed.
Can These Measures Be Used for Ducks and Quail?
Many exclusion principles apply, but housing details need adjustment. Ducks require particular attention to water management and drainage. Quail size, escape behavior, and life stage affect opening and enclosure choices. Use the same risk-assessment process rather than copying chicken-coop specifications without review.
Plan Protection Around the Whole Poultry House
Effective chicken protection connects suitable materials, continuous barriers, reliable doors, and consistent daily management. Start by identifying local threats, then close the weakest routes into the occupied enclosure.
For a poultry farm, make inspection, maintenance, and contractor responsibilities part of the original project plan. Reassess protection when the flock, equipment, or production system changes.
Planning a new poultry house or upgrading an existing enclosure? Contact the Sheedoz team with your location, flock size, housing layout, and main predator concerns to discuss your poultry equipment requirements.

 DE
 EN
 ES
 FR
 AR
 PT