
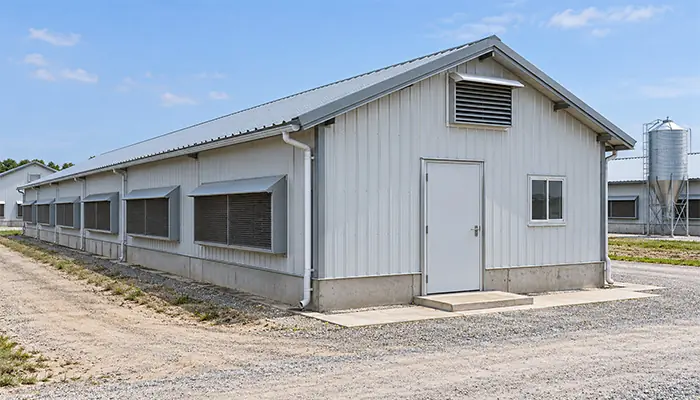
Simple outdoor chicken brooder ideas include a wooden box inside a weatherproof shed, a separate nursery pen in a coop, and a modular brooding area in a farm building. Each can provide a starting point for chick rearing when the enclosure, heat source and daily management suit the birds and local conditions.
The important distinction is protection. An outdoor brooder needs more than a lid: chicks need appropriate warmth, dry footing, accessible feed and water, and protection from weather and predators. A sheltered location outside the main farmhouse can work; an exposed box in the yard is a different proposition.
This guide compares six design ideas, explains how to plan a chick brooder setup, and outlines when a commercial brooding system deserves consideration.
What Is an Outdoor Chicken Brooder?
A chicken brooder is a managed environment for young chicks after hatching. It combines suitable housing with warmth, feeding, drinking and routine care. An incubator supports eggs before hatch; the brooder supports chicks afterward.
A brooder box is a compact enclosure. A brooder pen uses partitions to define an area within a larger space. A brooder house is the building containing the brooding equipment. Knowing which part you are designing helps you identify what else the project needs.
For this guide, “outdoor” means a protected brooding location in a shed, poultry building or purpose-built shelter. It does not mean that chicks or electrical equipment can be exposed to rain. Indoor-rated equipment still requires the enclosed, dry environment specified by its manufacturer.
Can You Brood Chicks Outdoors?
Outdoor brooding is possible when the protected environment can consistently meet the chicks’ needs. Newly hatched chicks need supplemental warmth; a warm afternoon does not establish that the same enclosure will remain suitable overnight.
Before choosing the location, check the conditions expected during the entire brooding period. Consider nighttime lows, wind-driven rain, direct afternoon sun and interruptions to essential services. Decide where the chicks can be moved if the planned space cannot maintain suitable conditions.
Check the heat source separately. A heating plate designed for an indoor room may have a minimum ambient operating temperature. A roof over an open pen does not automatically satisfy its instructions. Confirm the model’s permitted location and operating limits before building the enclosure around it.
Choose the system for the birds and the season you will actually manage. A sheltered nursery for older, feathering chicks should not be assumed suitable for a new batch of day-old chicks.
What Makes a Good Outdoor Chicken Brooder Design?
A useful design makes daily care straightforward. Evaluate the whole setup rather than choosing a box solely because it is inexpensive or easy to assemble.
| الميزة | What to check |
|---|---|
| الحماية من العوامل الجوية | Roof, walls and drainage keep the occupied area dry. |
| التهوية | Fresh air enters without a direct cold draft across the chicks. |
| Heat layout | Chicks can approach the warm area and move away from it. |
| Secure enclosure | Doors, mesh, edges and gaps suit the smallest chicks and local predator risks. |
| Feed and water | Equipment is accessible to chicks and easy for staff to inspect. |
| Cleaning and expansion | Surfaces can be reached, and space can increase as birds grow. |
For a litter-based brooder, use suitable dry, absorbent bedding over a sound floor. Avoid leaving chicks on slippery bare plastic, cardboard or similar smooth surfaces. The University of Kentucky’s brooding guidance emphasizes shelter, suitable footing, accessible resources and room to move toward or away from the heat.
Six Simple Outdoor Chicken Brooder Ideas
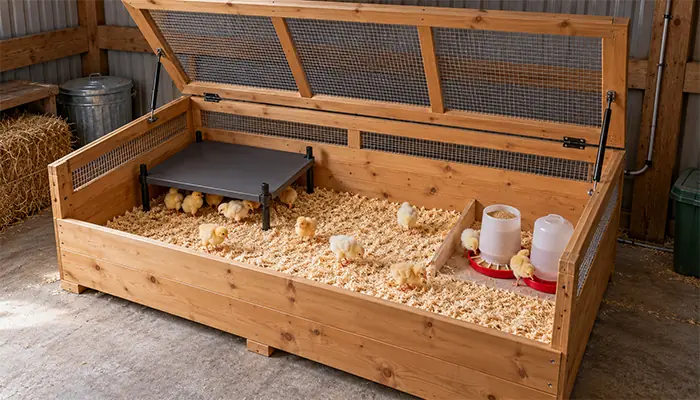
1. A Wooden Brooder Box Inside a Weatherproof Shed
A wooden chick brooder can be planned as a broad, accessible enclosure inside a dry shed. Use a lid or service doors that let you reach the entire floor without dismantling the heating arrangement.
Plan ventilation openings and secure them with mesh selected for the chicks and the site’s predator risks. Choose sound materials and cleanable interior surfaces. Keep sharp fasteners and exposed edges out of the occupied area.
This idea is worth evaluating for a small, occasional batch. Its main limitation is expansion: a convenient box at placement may become awkward later. Decide where the chicks will go next before fixing the dimensions. Plan heater mounting independently, following the appliance’s clearance and support requirements.
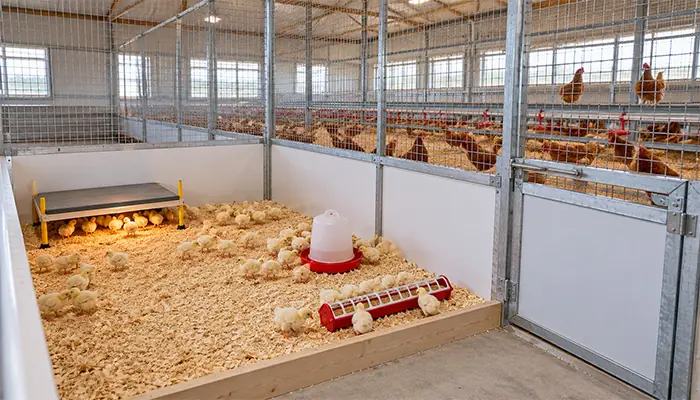
2. A Separate Brooder Pen Inside a Chicken Coop
A partitioned nursery can use space within an existing coop while keeping chicks physically separate from adult birds. Give the nursery its own feeding and drinking equipment and access that does not require opening it into the adult flock.
Inspect the roof, ventilation openings and doors before choosing the position. Avoid placing the pen where adult birds can roost above it or where routine work disturbs its heating equipment.
A partition provides physical separation, but shared air, footwear and tools can still connect the groups. For a commercial project or repeated batches, include this shared-house exposure in the flock-health plan. A separate rearing building may be the more practical option.
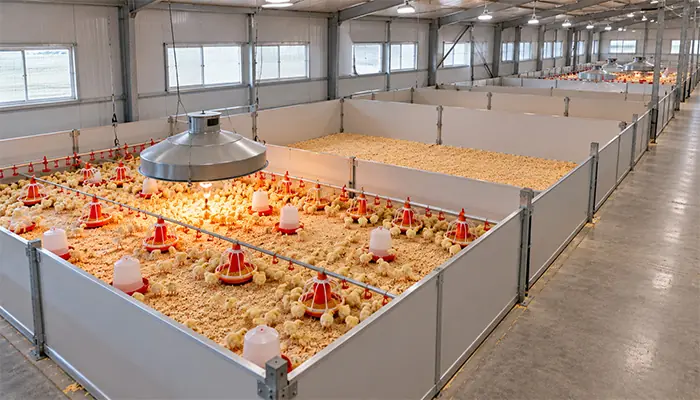
3. A Modular Floor Pen in a Roofed Farm Building
A modular pen uses adjustable partitions within a protected building. The layout can reserve an expansion area while keeping the initial brooding zone manageable.
Mark the working aisle before installing panels. Staff should be able to refill equipment, replace wet bedding and inspect corners without climbing across the enclosure. Where a brooder guard is appropriate, arrange it around the heat zone while allowing chicks room to move away from the heat.
This option gives a growing farm flexibility, but the host building still determines weather protection and environmental control. Open sides, roof leaks or unsuitable utilities need attention before the pen is stocked.
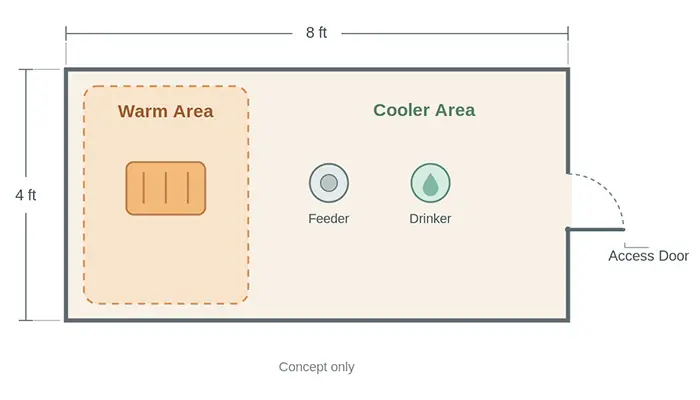
4. A 4 × 8-Foot Brooder with Planned Expansion
A 4 × 8-foot chicken brooder is a useful example for sketching a rectangular layout. Its gross footprint is 32 square feet, approximately 2.97 square meters.
Place the proposed heat zone toward one end, with an accessible cooler area and chick-appropriate feed and water nearby. Check the actual appliance footprint and clearance requirements before deciding where each item belongs.
The dimensions alone do not establish capacity. Subtract space unavailable to chicks, then apply an appropriate allowance for the bird type and oldest age planned in the enclosure. Consider a removable partition leading to another protected area, or a scheduled transfer to larger housing. Treat the sketch as a planning example rather than a construction drawing.
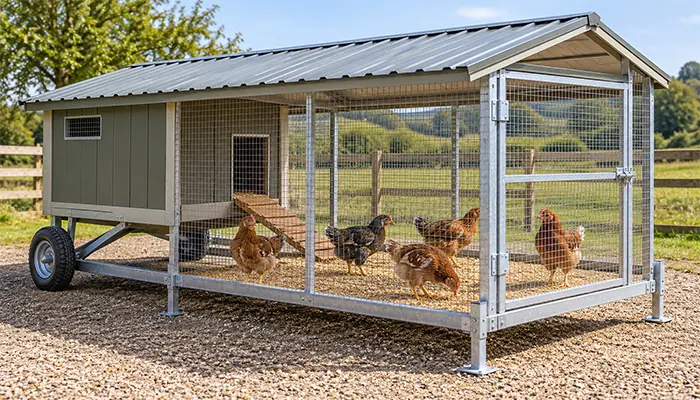
5. A Movable Sheltered Nursery for the Transition Stage
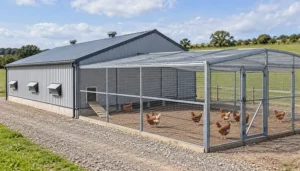
A movable nursery can be considered for older chicks transitioning toward their next housing environment. It needs a secure sheltered compartment, practical inspection access and a plan for changes in weather.
Its value is flexibility, but every new position needs assessment. Moving an enclosure can change shade, wind exposure, ground moisture and access to utilities.
Do not treat a lightweight run as an equivalent replacement for a controlled brooding area. Check feathering, acclimation and continuing heat needs before transfer. If supplemental heating remains necessary, the location and supply must still meet the equipment’s installation requirements.
6. A Dedicated Brooder House for Repeated Batches
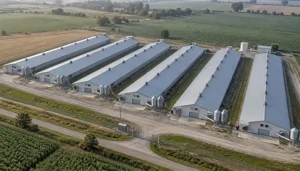
A dedicated brooder house lets the farm plan the building and equipment together. The brief can include brooding zones, working aisles, feed storage, water delivery, ventilation and cleaning access.
For repeated batches, draw the full operating cycle: chick arrival, daily care, expansion, transfer, litter or manure removal, cleaning and preparation for the next flock. Identify where incoming supplies and removed waste will travel.
This is a larger project than building a box. Compare the proposed house against expected batch frequency and staffing. A clear operating plan is more useful than choosing a building only by its advertised bird capacity.
How to Plan Brooder Size and Layout
Start with the birds, not a fixed box size. Record the bird type, batch number, arrival age and expected transfer age. Then select a relevant space guideline for that stage and production system.
Space requirements increase as birds grow. Colorado State University Extension also distinguishes space at feeders and drinkers from floor area. A larger enclosure will not resolve inadequate access to feed or water.
Use this planning relationship:
Required usable area = planned chick number × appropriate space allowance per chick.
Draw equipment footprints and identify which floor areas chicks can actually use. Add working access outside the enclosure and mark any area reserved for expansion. Recheck the drawing for the oldest birds that will remain there.
A practical brooder diagram should show the warm zone, cooler zone, feed, water and access door. Chicks should be able to reach resources and leave the warm zone without squeezing through a blocked passage.
How to Build and Set Up a Simple Chick Brooder
Step 1: Prepare the Location and Materials
Choose a protected location that staff can reach in poor weather. Resolve roof leaks, drainage problems and damaged doors before assembly. Provide a suitable electrical installation where powered equipment is required.
Your materials list will depend on the design, but normally includes enclosure panels, secure fasteners, access doors, ventilation protection, suitable flooring or bedding, heating equipment, monitoring equipment, feeders and drinkers.
Step 2: Assemble for Access and Cleaning
Build the enclosure around the layout you have drawn. Check edges, joints, doors and mesh openings before adding birds. Make sure the lid or door allows routine servicing without moving a hot appliance.
Use materials and finishes appropriate for the housing environment. Allow any applied products to cure according to their instructions before stocking. Avoid inaccessible cavities where litter or spilled feed will collect.
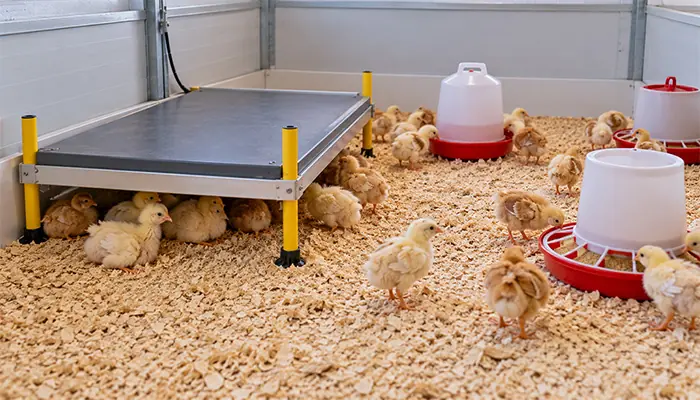
Step 3: Install and Test the Heat Source
Install heating equipment according to its manufacturer, including support, clearances, permitted surroundings and protection from moisture. A heat lamp needs secure suspension independent of its electrical cord and separation from combustible bedding. Keep hot bulbs protected from water splashes.
For a lamp-heated setup, University of New Hampshire Extension describes an initial warm-zone temperature of 90–95°F, approximately 32–35°C, measured near chick level below the lamp. This is a warm-zone reference, not a target for every part of the room or the surface of a heating plate. Use the guidance appropriate to your birds and heating system.
Run and check the completed setup before arrival, including representative overnight conditions. Observe the occupied area as well as the heater itself.
Step 4: Arrange Feed, Water and Bedding
Use feeding and drinking equipment suited to the chicks’ size. Place it where they can find and reach it, keeping the route clear. Provide suitable chick starter feed and continuous access to clean water.
Keep bedding dry and investigate recurring wet patches. Reposition or adjust drinkers as appropriate rather than repeatedly covering a persistent leak with new bedding.
Step 5: Monitor the Flock and Adjust the Setup
Observe how chicks distribute themselves. Huddling close to a heat source can indicate cold conditions; avoiding it can indicate excessive warmth. Uneven grouping may also point to drafts. Check the environment and birds together before adjusting equipment.
Record useful observations, equipment problems and space changes. A brief daily log helps the team notice recurring issues and prepare a better setup for the next batch.
Common Outdoor Brooder Mistakes to Avoid
- Designing for arrival day only. Plan the space and resource access needed before the birds leave the brooder.
- Judging the location at midday. Check overnight and adverse-weather conditions inside the enclosure.
- Closing every opening to retain heat. Address drafts while maintaining suitable ventilation.
- Filling the whole enclosure with heating equipment. Preserve usable space away from the warm zone.
- Ignoring water spills. Correct the cause and replace affected bedding.
- Relying on a tent or pop-up pen alone. Fabric walls do not establish weather resistance, predator protection or suitability for a heat source.
- Assuming physical separation is disease isolation. Include shared tools, footwear and the surrounding flock in the management plan.
DIY Brooder Box or Commercial Brooding System?
A DIY box is one way to organize a small project. As batch sizes or frequency change, compare it with modular floor brooding and purpose-designed commercial equipment.
| Option | Main planning questions |
|---|---|
| DIY brooder box | Can staff inspect, clean and expand it throughout the planned brooding period? |
| Modular floor brooding | Does the building support the required heating, ventilation, bedding management and service access? |
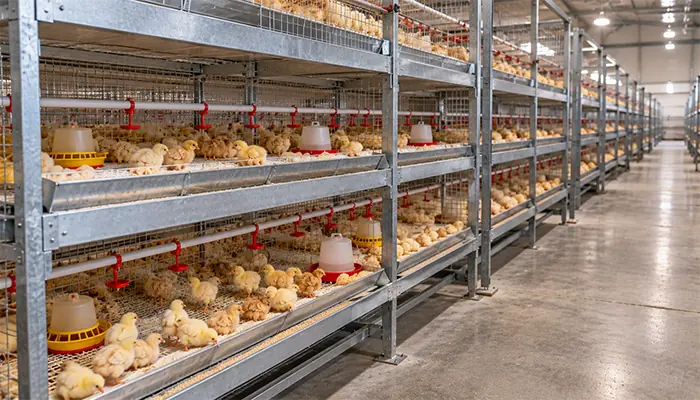
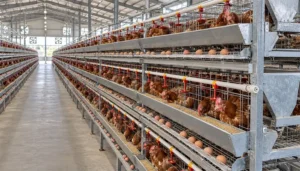
| Commercial brooder cage installation | Do flooring, feed and water access, environmental services and equipment scope suit the birds and farm? |
Compare the complete operating arrangement. A brooder cage is not automatically a self-contained heated nursery, and a floor pen does not establish that the surrounding building is suitable.
For farms evaluating cage-based rearing, Sheedoz offers baby chick and brooder cage systems. Ask for a proposal addressing the birds’ age range, building dimensions, feeding and drinking access, flooring, manure handling and environmental requirements.
When comparing quotations, list the included equipment and installation services. Clarify responsibility for heating, ventilation, utility connections, commissioning, training and replacement parts. Use your actual batch plan to judge whether the proposal fits.
Frequently Asked Questions About Outdoor Chicken Brooders
Can Day-Old Chicks Be Brooded Outdoors?
Only where a protected environment can consistently meet their brooding needs. Assess the enclosure, heat source, weather and supervision together. An exposed pen is not equivalent to a prepared brooding room.
What Is the Best Outdoor Brooder for Chicks?
The most suitable choice matches chick age, batch size, weather and daily care. Compare those requirements before choosing between a box, modular pen or dedicated house.
Can I Put a Brooder Inside a Chicken Coop?
A separate nursery area is possible, but it needs its own suitable environment and resources. A partition alone does not isolate chicks from the health risks associated with sharing a building with older birds.
How Many Chicks Fit in a 4 × 8 Brooder?
The footprint provides 32 square feet before accounting for layout. Determine usable area and apply an appropriate allowance for the bird type and growth stage. Plan for the oldest chicks that will occupy it.
Can I Use a Wooden Brooder Box?
Wood can form the enclosure, provided the design addresses cleaning, access and the surroundings. Heater support and clearances must follow the appliance instructions; the box material alone does not establish suitability.
Can a Brooder Heat Plate Be Used Outdoors?
Check the exact model. Some plates are intended for indoor use and specify minimum ambient temperatures. Do not assume that placing one under a roof makes an open-air location suitable.
When Can Chicks Leave the Brooder?
Consider feathering, weather, acclimation and whether the next housing can meet their needs. Follow the relevant bird-management guidance and avoid using age alone as the transfer decision.
Choose a Brooder Around the Birds and the Farm
The most useful outdoor chicken brooder ideas combine a practical enclosure with a protected environment and a workable care routine. Start with chick age, weather and batch size, then plan heat, space, food, water and cleaning together.
For a small project, a sheltered box or modular pen may provide the layout you need. For repeated commercial batches, evaluate the complete house and equipment arrangement before buying individual components.
Planning a chick-rearing project? Discuss your brooding equipment requirements with Sheedoz. Share your country, bird type, batch size, chick age range and house dimensions so the team can review the project scope.

 AR
 EN
 ES
 FR
 PT
 DE